
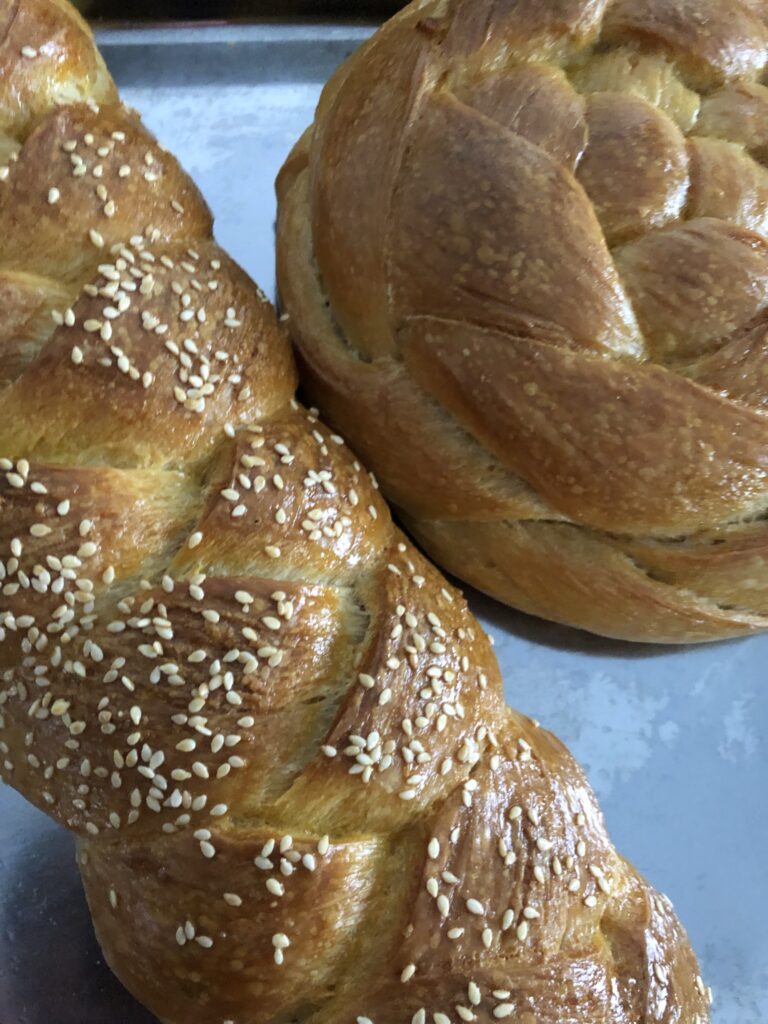
A few years ago when we began observing Sabbath and keeping the Biblical feasts, I was introduced to the wonderful thing that is challah. Now, you may have seen it on the grocery store shelves or in the form of a hamburger bun at some specialty sandwich shops, but the real roots of challah run deep.
Challah (hall-LUH) is the Hebrew word originally used to describe the portion of the bread offering set aside for God in Numbers 15. Since then, it has become a thousands of years old tradition with many variations but undisputedly served on Shabbat and feasts (except Passover, of course).
When I was beginning to toy around with sourdough, challah was one of the first things that kept coming to mind. I love this delicious flaky texture and the softness from the eggs, but could it be made with sourdough?
Of course! That’s how bread was made for millennia before we had commercial yeast, and so this recipe was born. The dough makes plenty for two medium –sized loaves, or enough for one large loaf.
Since this is made with sourdough, the dough has to be prepared well in advance. I have options for a quicker bake, but if you are gluten-sensitive, the long fermentation method is a great option. If you want to do the long fermentation and have challah ready to bake for Shabbat dinner Friday evening, feed your starter Tuesday night and mix the dough together Wednesday morning. For the quickest bake, feed your starter Thursday morning and mix the dough Thursday night.
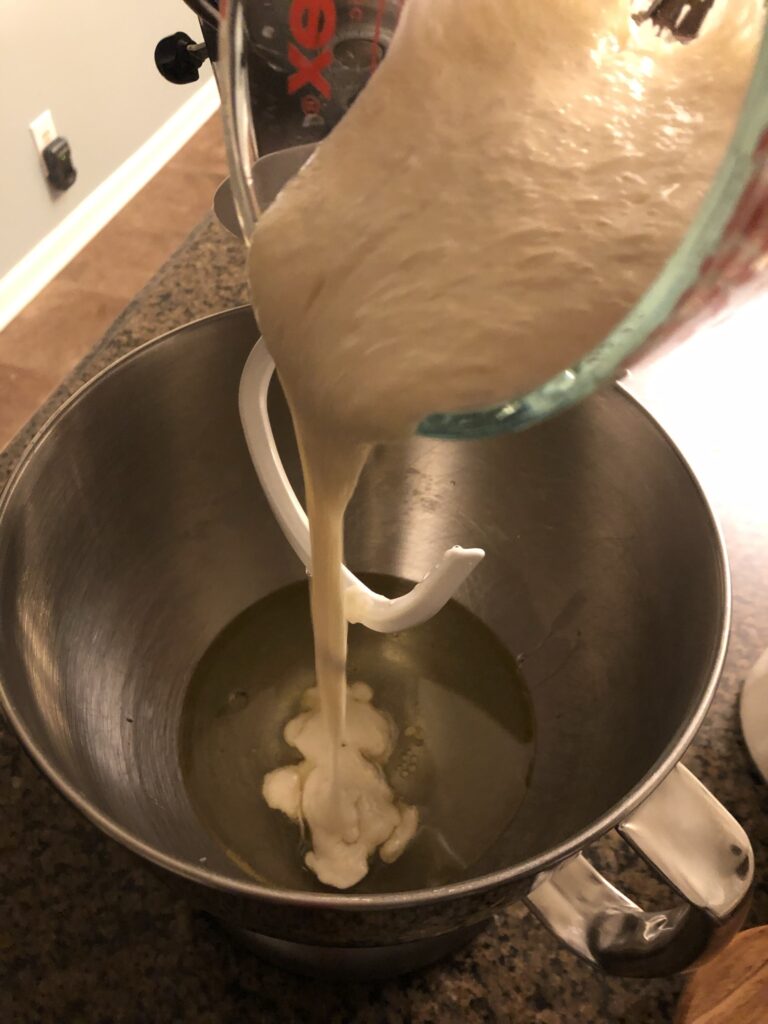
I make this dough in my stand mixer, but it can be hand-kneaded in a large bowl. Begin by adding the water and sourdough starter to the bowl. A sure way to know your starter is active and ready is that when you pour it into the water it will float. Froth the water and starter together until it’s combined.
Add the oil, eggs, honey or maple syrup, and salt then whisk together. I don’t add much sweetener in this recipe because I like my challah nice and savory, but the fluffy bread sure is delicious slathered in syrup as Sabbath French Toast the next day!
Start adding flour one cup at a time and mix with a spatula or on low with the dough hook attachment on your mixer. After adding 4 cups of flour, begin adding the flour ¼ cup at a time, mixing on medium-low speed until the flour is absorbed.
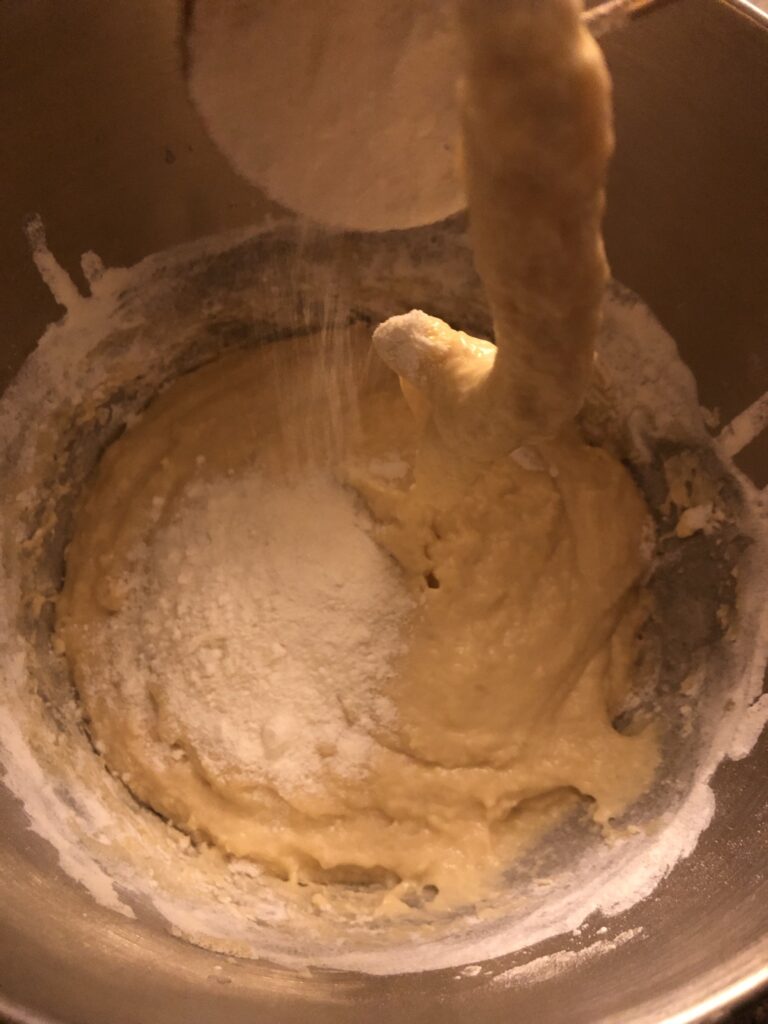
My dough usually takes right at 5 cups of flour, but you may need a little more or less depending on your climate and specific ingredients. The dough is ready when a ball forms and is no longer sticking to the sides and/or your hands but is still soft.
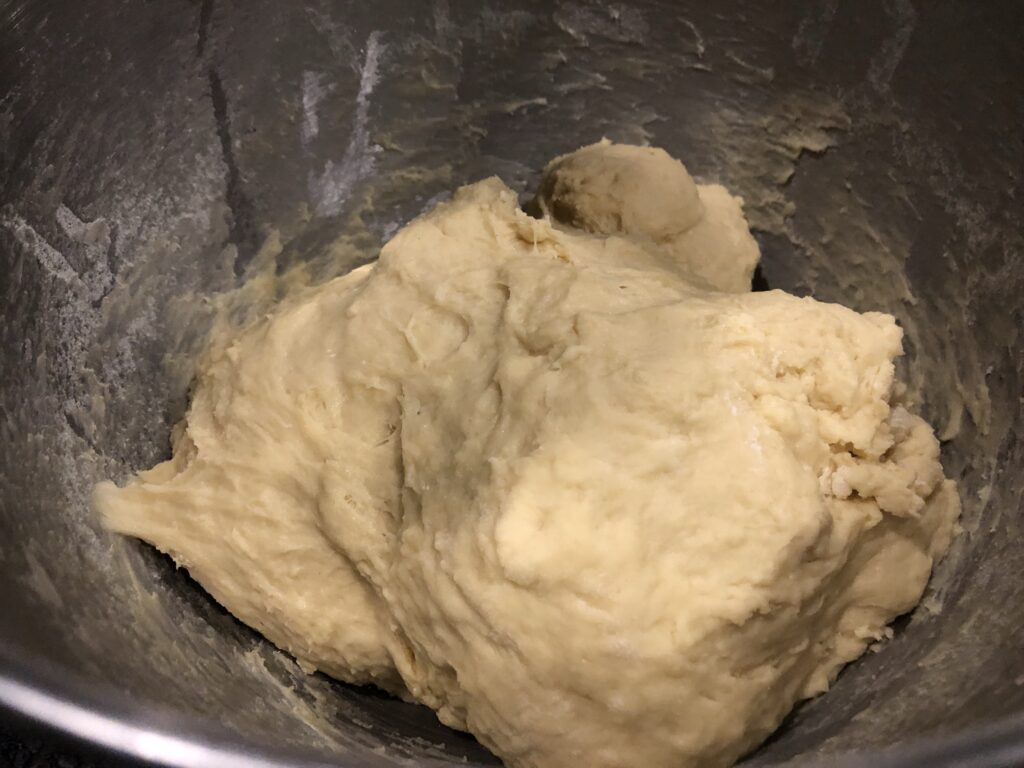
Remove the dough from the bowl. As an honest homemaker, I don’t ever clean my bowl. You can, but I don’t see the need. Oil the bowl and the dough ball and place it back into the bowl to rest. Cover the bowl with a loose cloth or tea towel.

Place the bowl into a warm spot. If it’s summer, the counter is fine. If it’s winter, an oven with the light on or on top of a running clothes dryer works great. Let the dough rest for 8 to 12 hours or until nearly doubled.
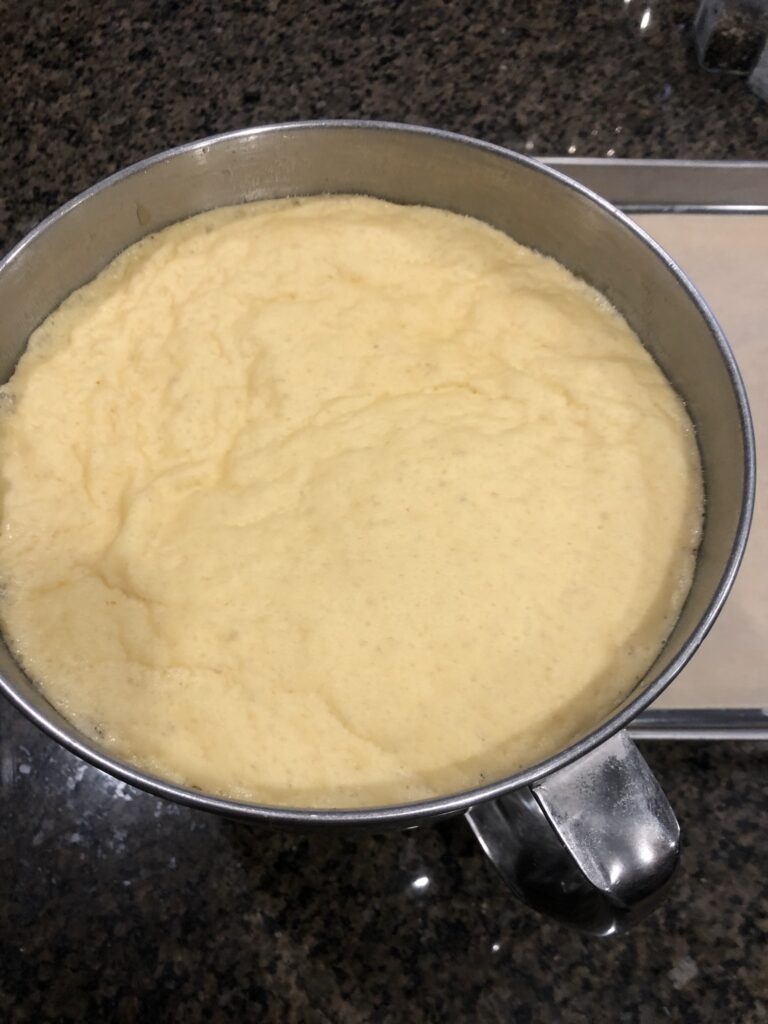
Once the dough has bulk fermented, use your hands or a dough scraper to gently pull the dough from the inside of the bowl and place it onto a hard surface or countertop. Do not punch down the dough, it will slightly deflate on its own.
Since the dough was oiled before rising, it should not stick to the surface so there’s no reason to add flour. To make it a little easier to handle, run your hands under water before working with the dough. The water on your hands will repel the oil on the dough and nothing should stick.
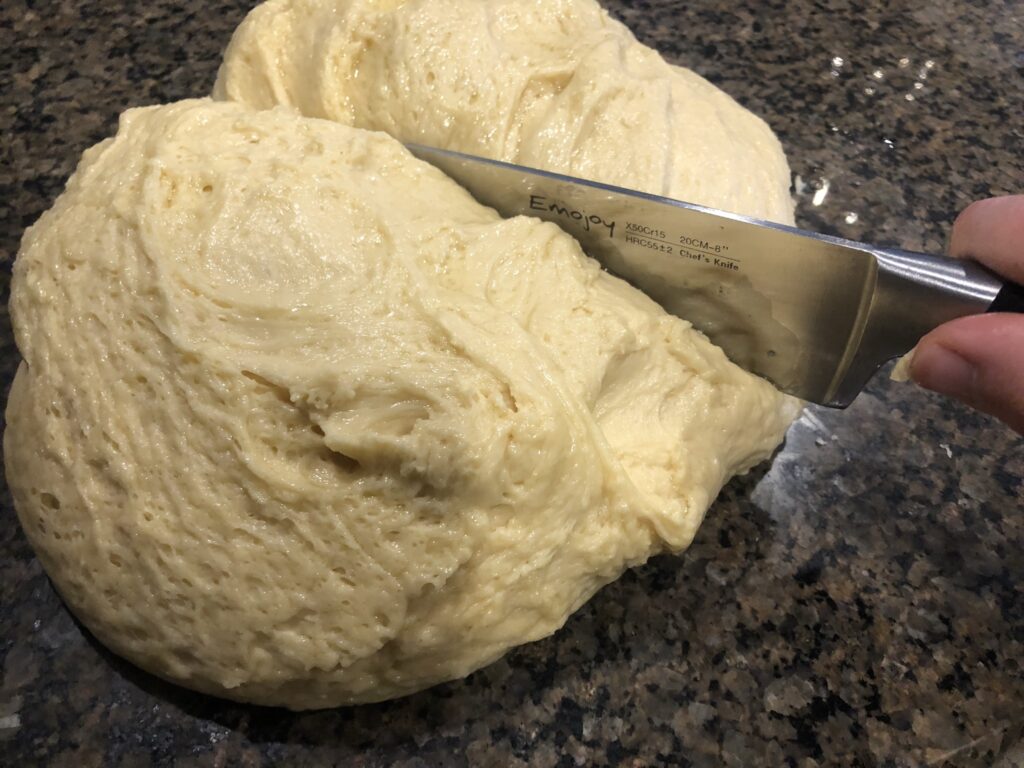
Here is where you will shape the dough. If you want one large loaf, use a sharp kitchen knife to cut the dough into 3 even pieces or however many braid strands you want. For two smaller loaves, cut the dough in half and then into the number of pieces needed for each loaf.
Hold one piece of dough in your hands and begin gently squeezing upward with one hand and downward with the other to create a long strand. Make each piece of dough into a rope about 16″ long and 1-2″ wide, depending on if you are making a large or medium loaf.

For a traditional loaf, do a 3-strand braid and pinch together the ends on each side then tuck them under. You can leave your braided loaves as they are, or begin to spiral the braid to create a round loaf.
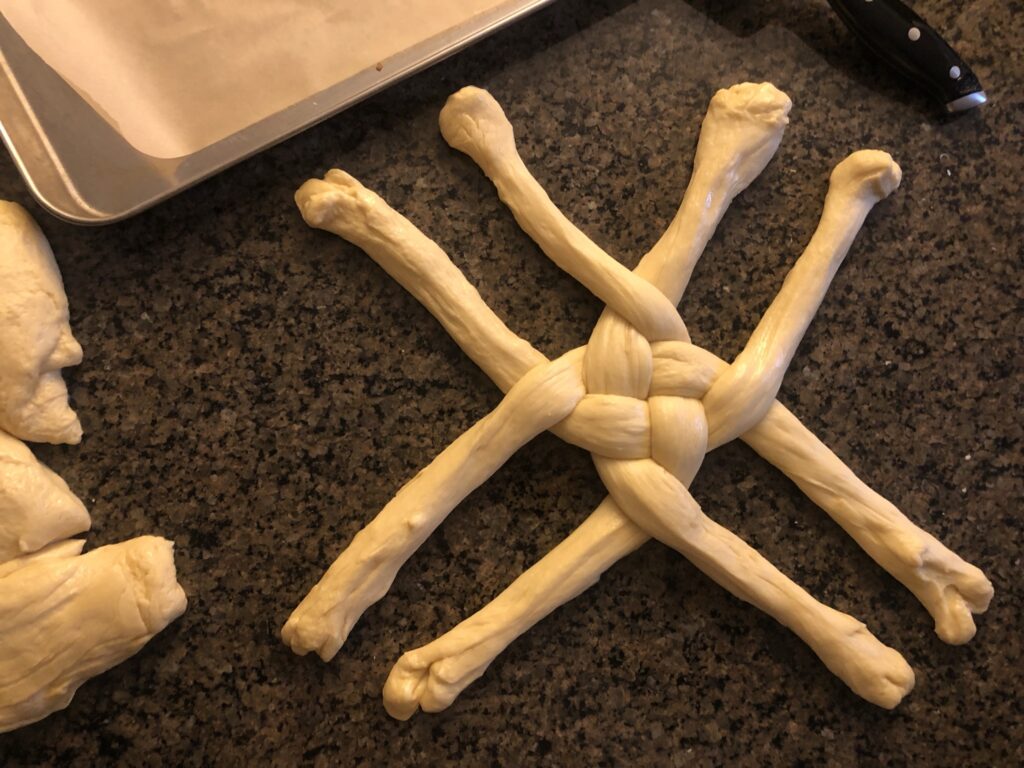
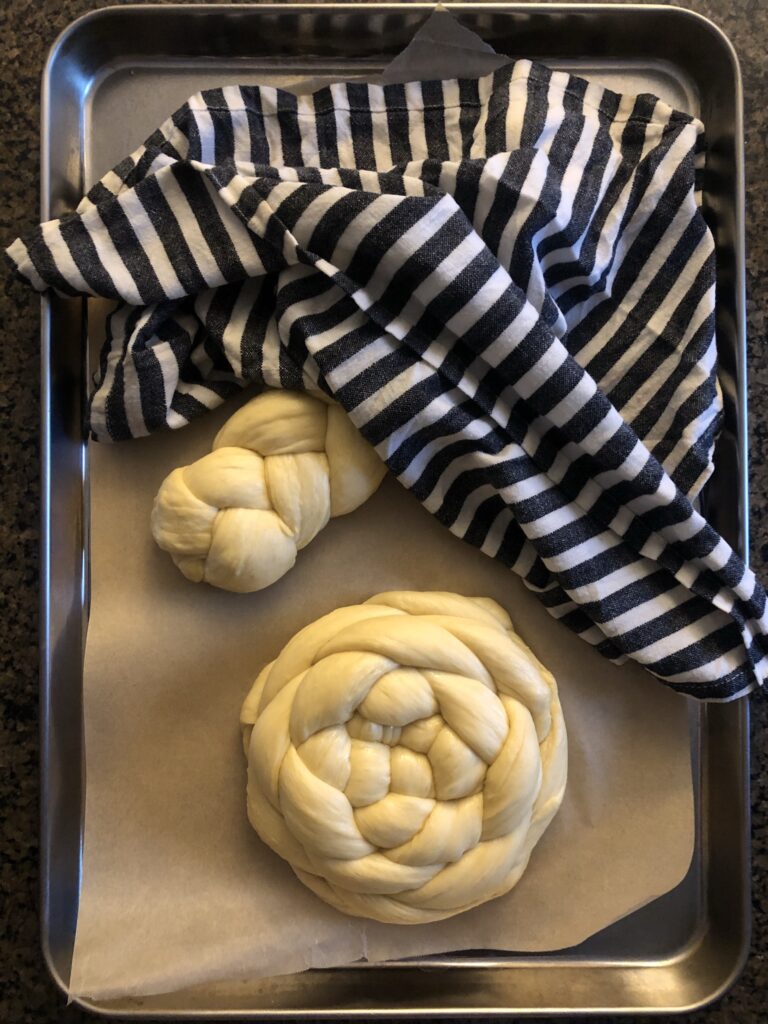
I am doing a 4-strand round loaf. Begin by laying two strands parallel to each other and two others perpendicular to the first two.
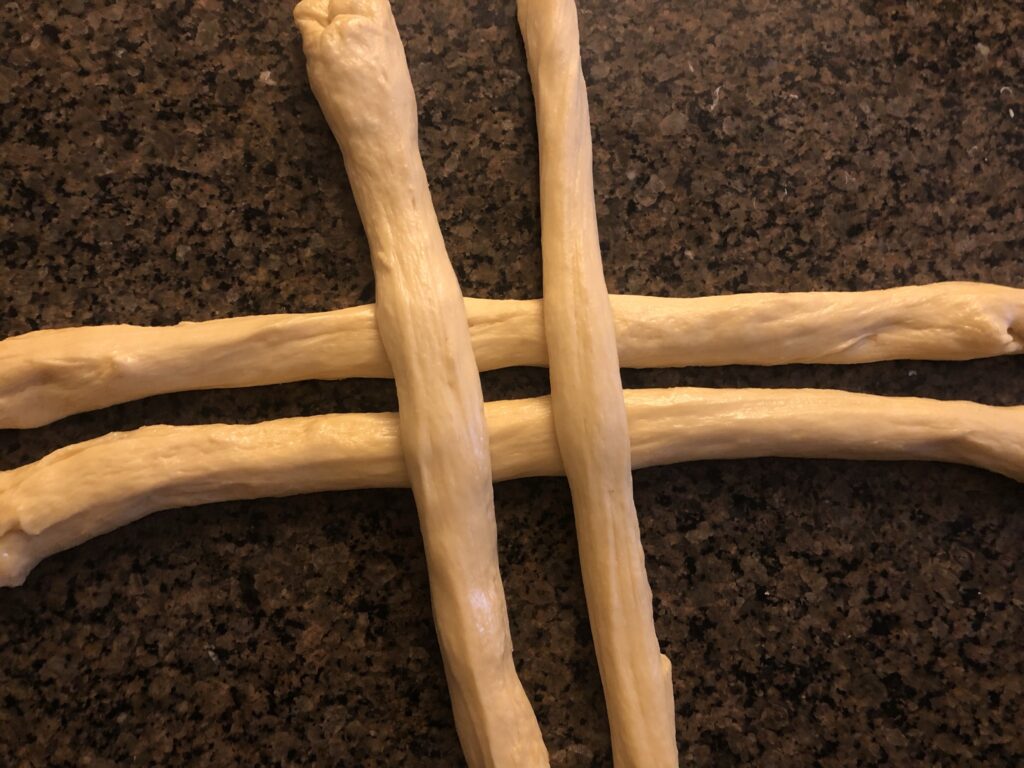
Lift a side of one of the bottom strands and place the closest top strand beneath it. Do the same on the opposite side with the other bottom strand to create a cross hatch in the middle of the strands. It should look like a woven # symbol.
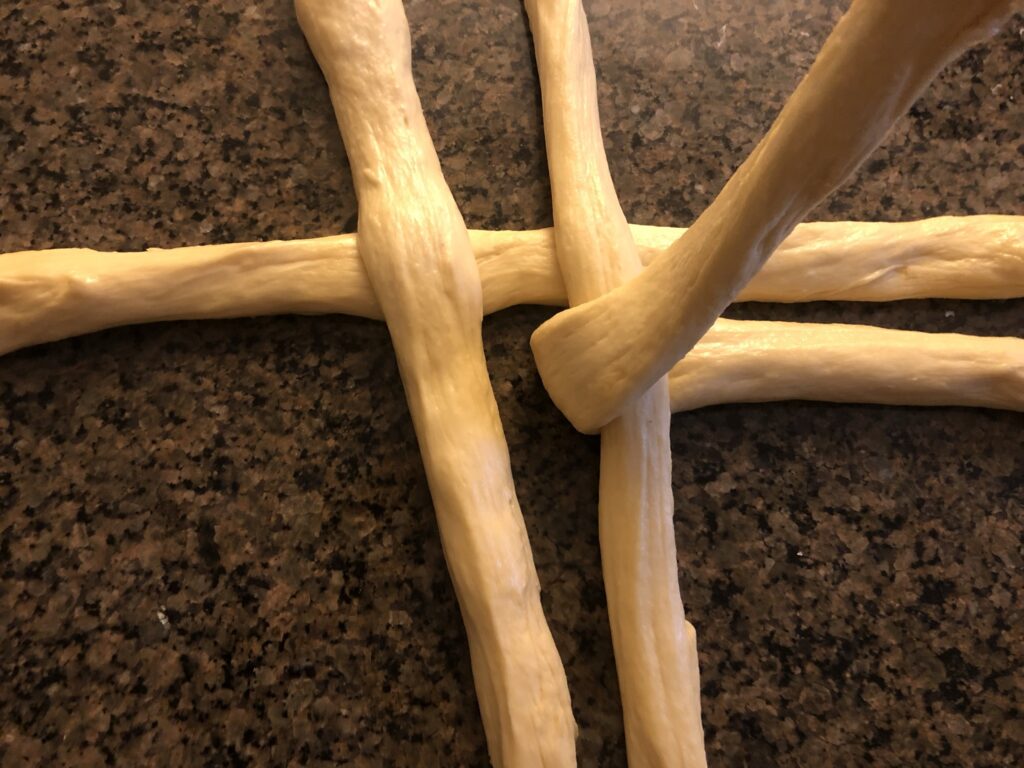

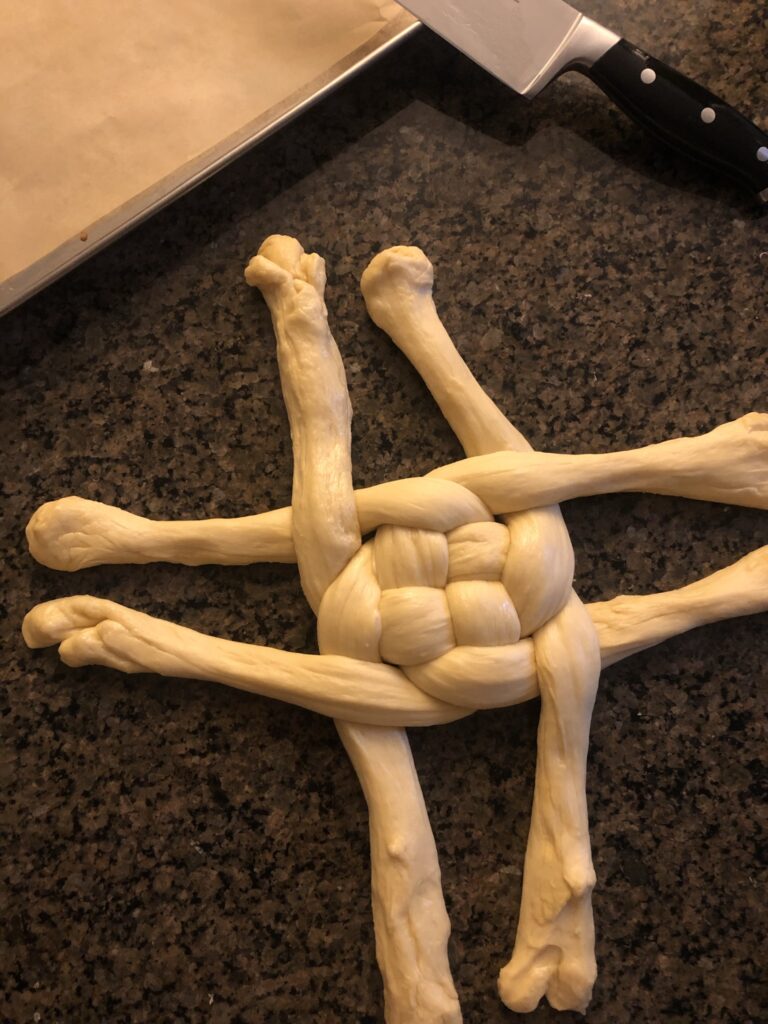
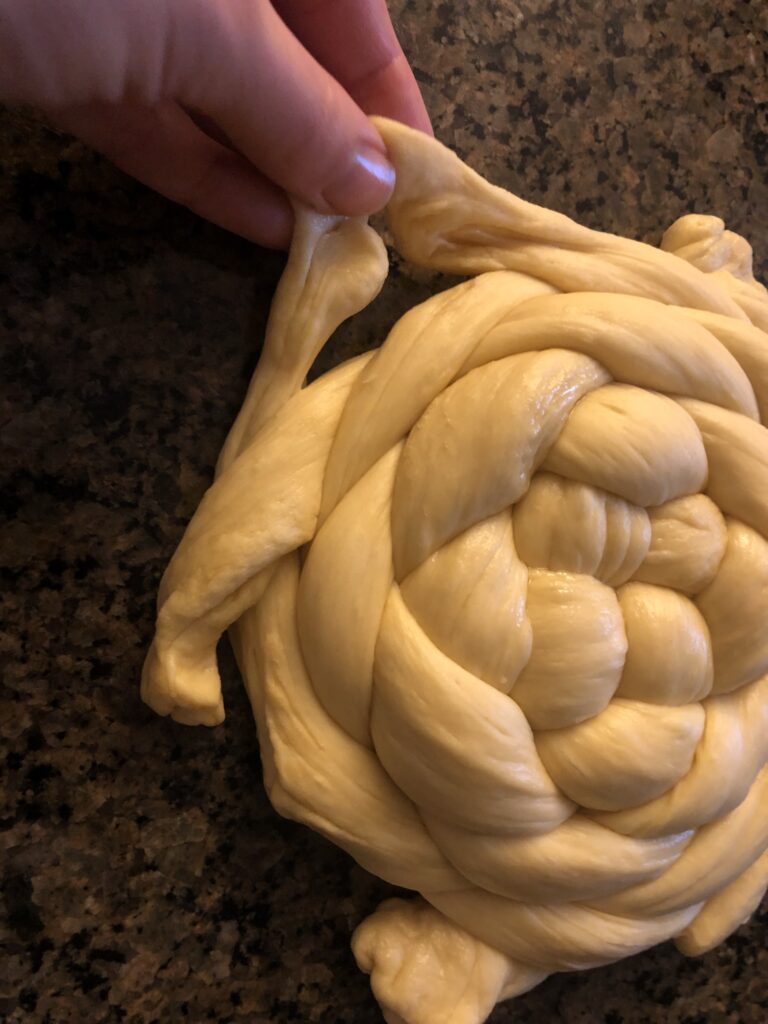
Once the hatch is created, cross the strands that are directly next to each other. There should be 4 crosses.
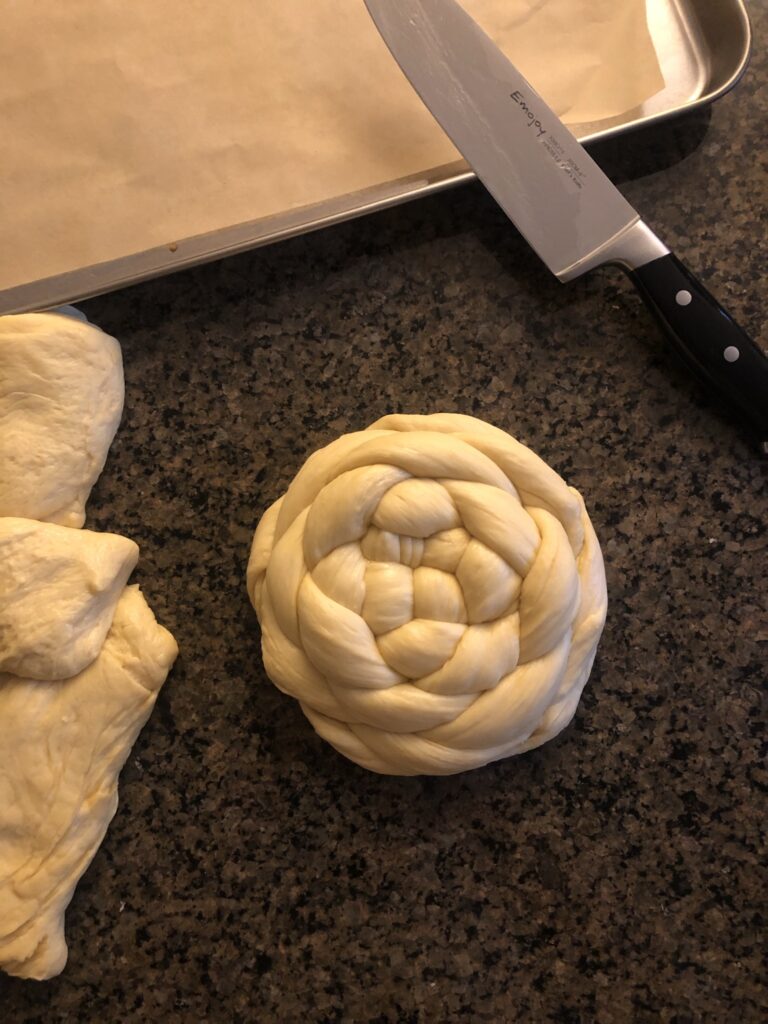
Continue crossing on each side (4 times per round) the strands that are adjacent to each other. After a few rounds and the dough is tightly woven or you can’t cross strands anymore, pinch the strand ends together and tuck them under the loaf.
Once your loaves are shaped, placed them onto a parchment-lined baking sheet. Dampen a lint-free towel (I like to use my cloth napkins or tea towels), and cover tightly to the shape of the loaf.
If you are baking right away, let the loaves sit covered in a warm place for 3-4 hours. If you are long fermenting, place baking sheets into the refrigerator for 14 hours up to 48 hours.
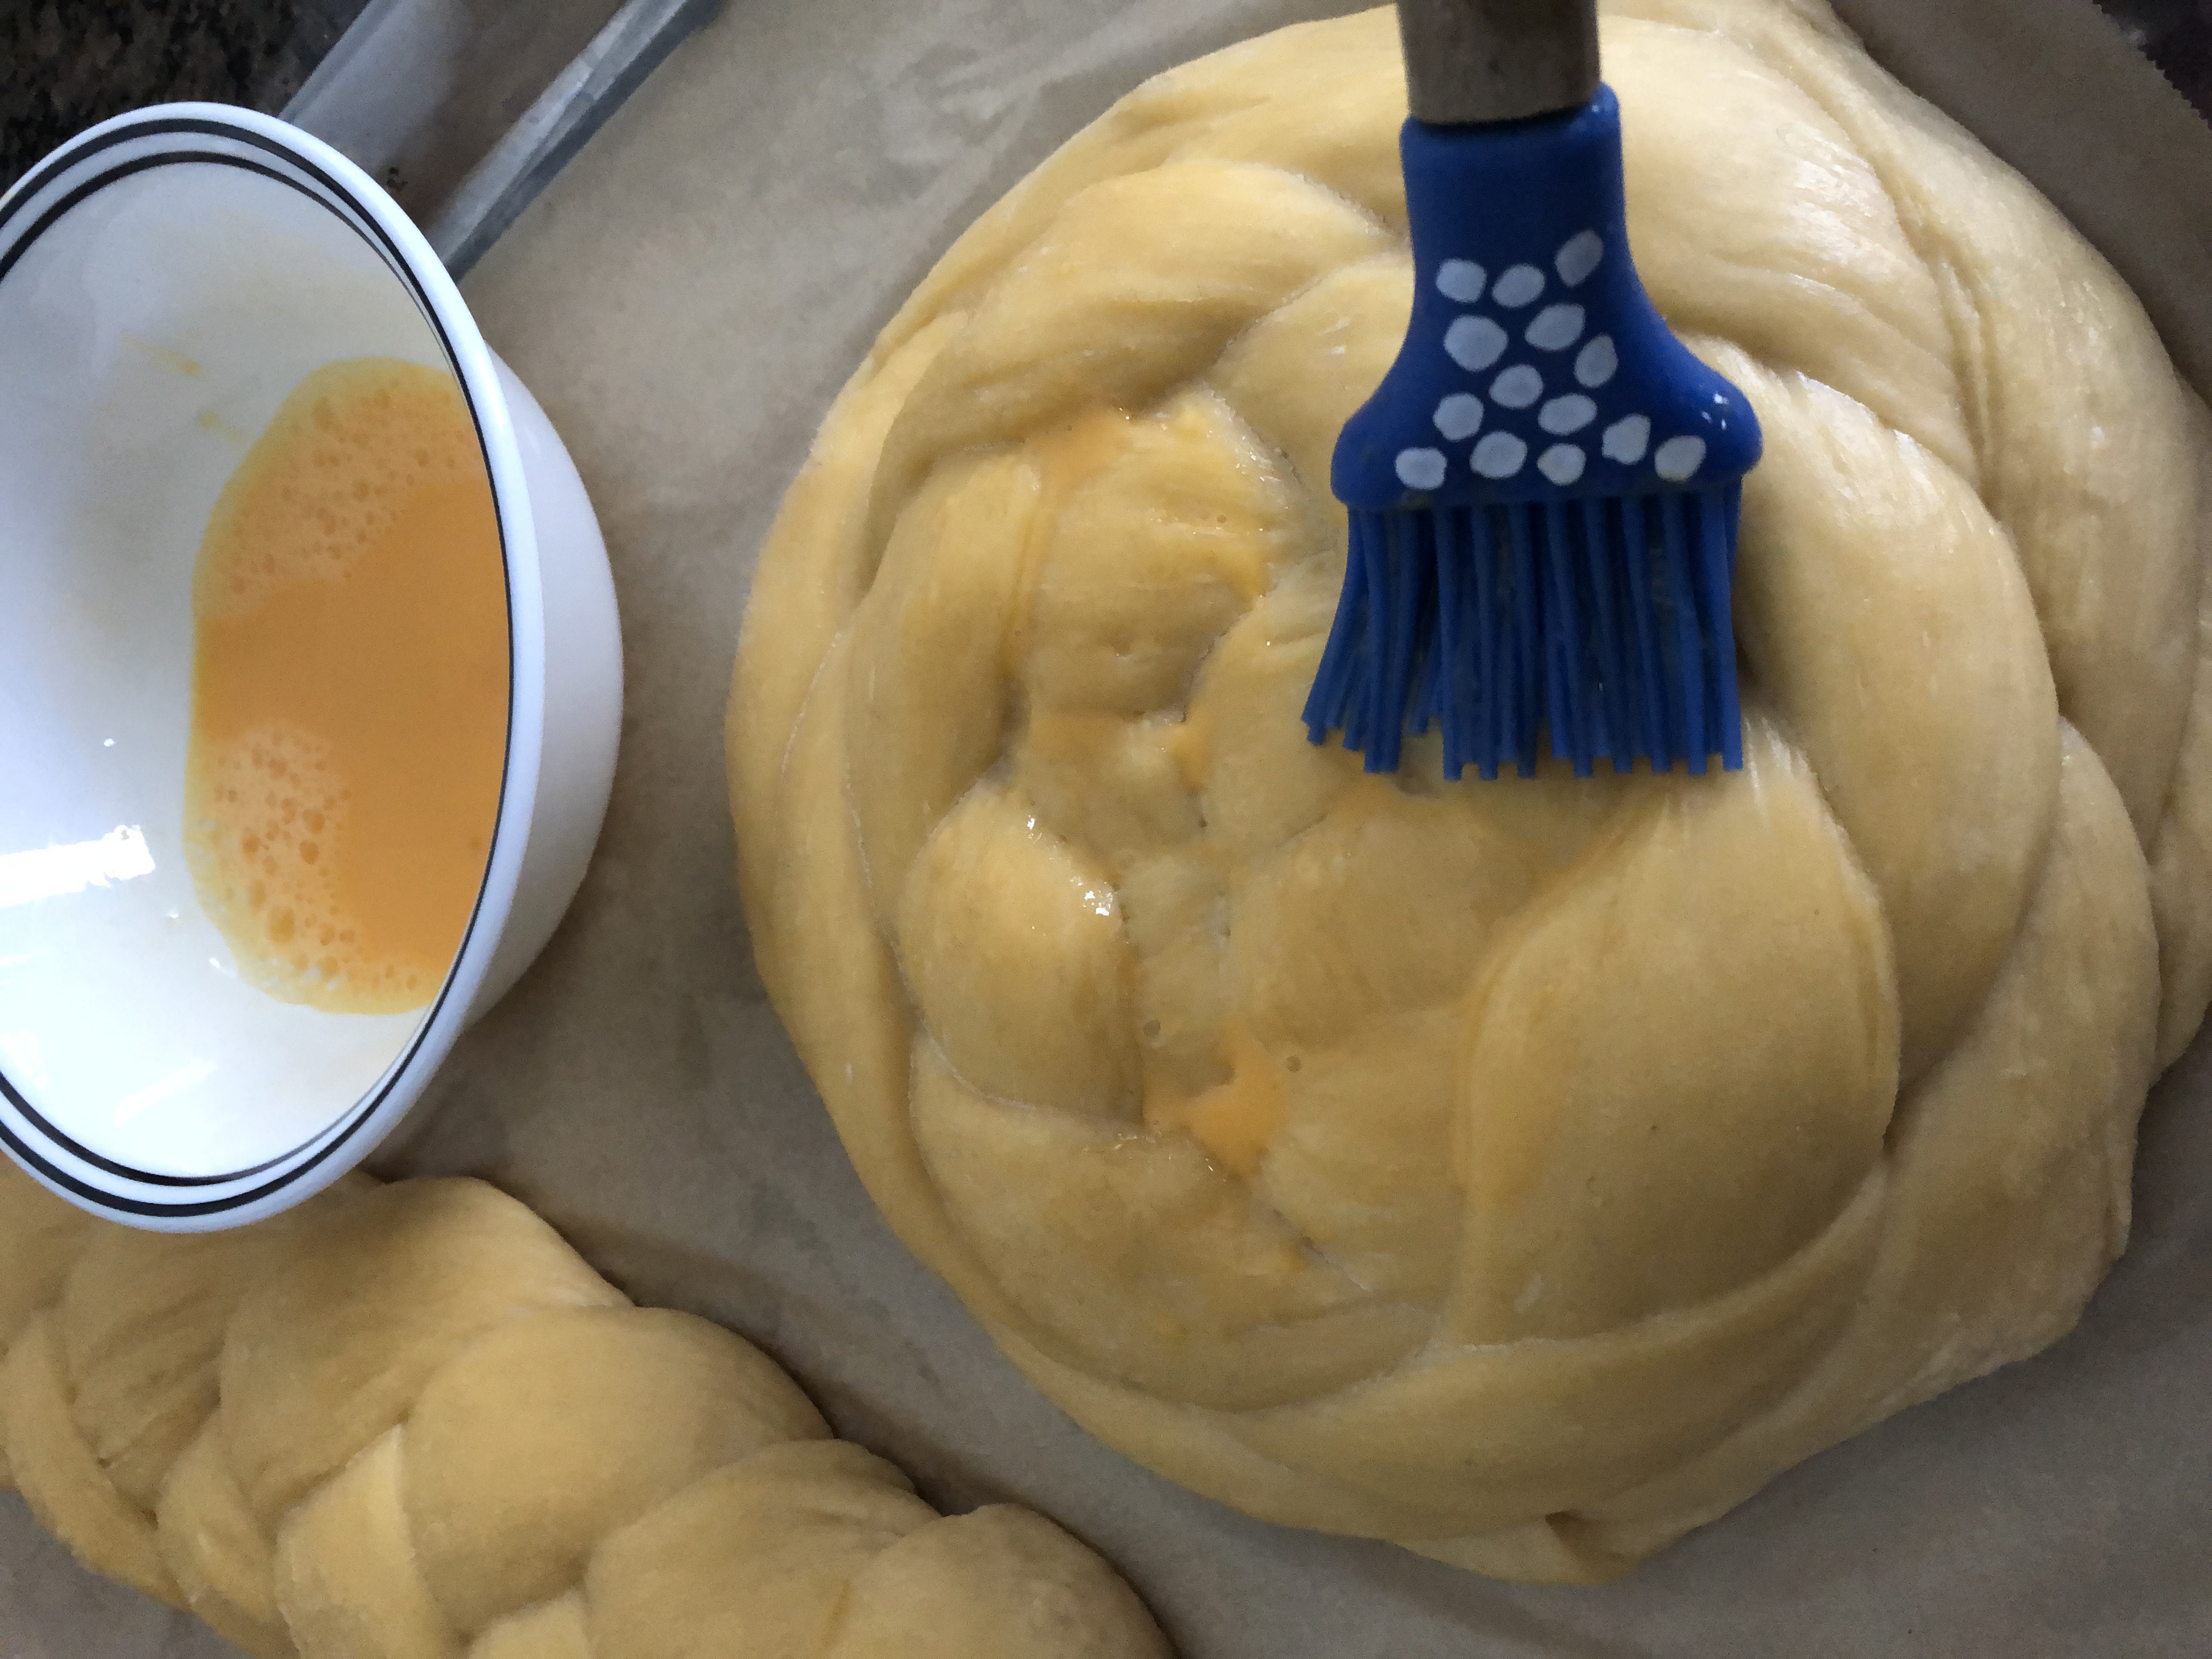
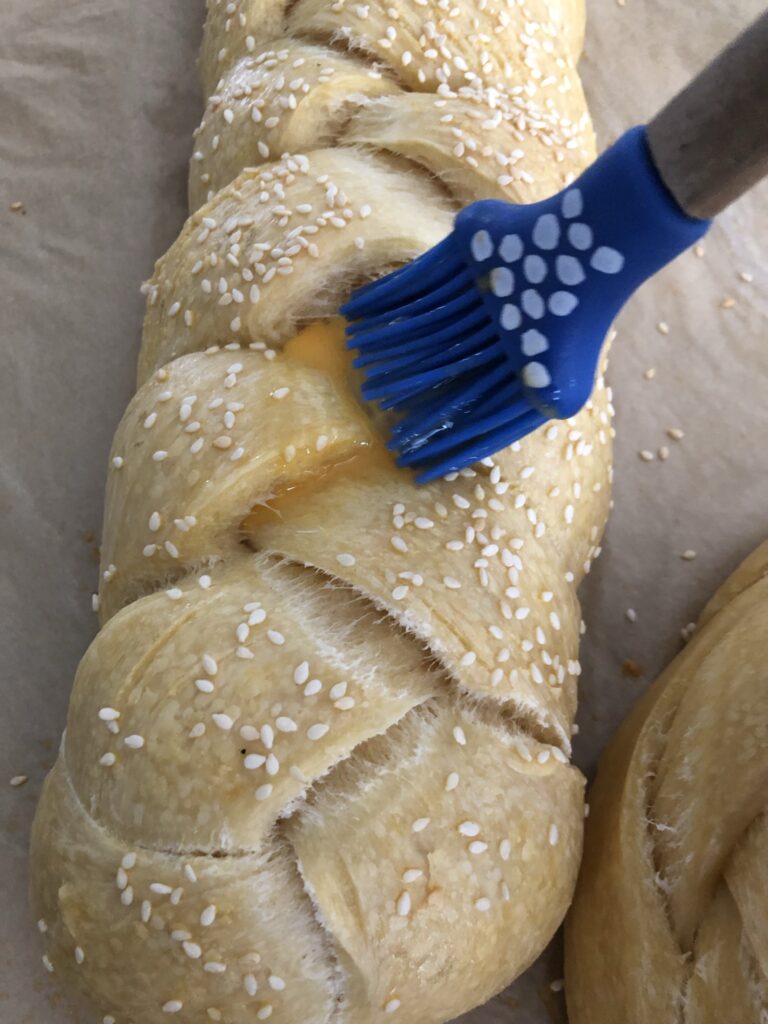
After the second ferment, preheat the oven to 375°. Mix a tablespoon of water and an egg yolk together and wash the dough with a pastry brush. I like to sprinkle sesame seeds on my challah, but plain is delicious as well.
Bake for 30 minutes then remove from the oven. The bread will have expanded in the oven, so use the remaining egg wash to wash the bread a second time.
Return to the oven with the baking sheet turned the opposite way from the first bake (rotate the sheet 180°) to allow the bread to brown more evenly. Bake for 20 more minutes.
If it becomes brown to your liking before the last 20 minutes is done, you can tent it with foil to prevent burning.
When done baking, allow to cool for at least 10 minutes. There is a big debate on whether you should slice or tear the bread, but it’s delicious either way!

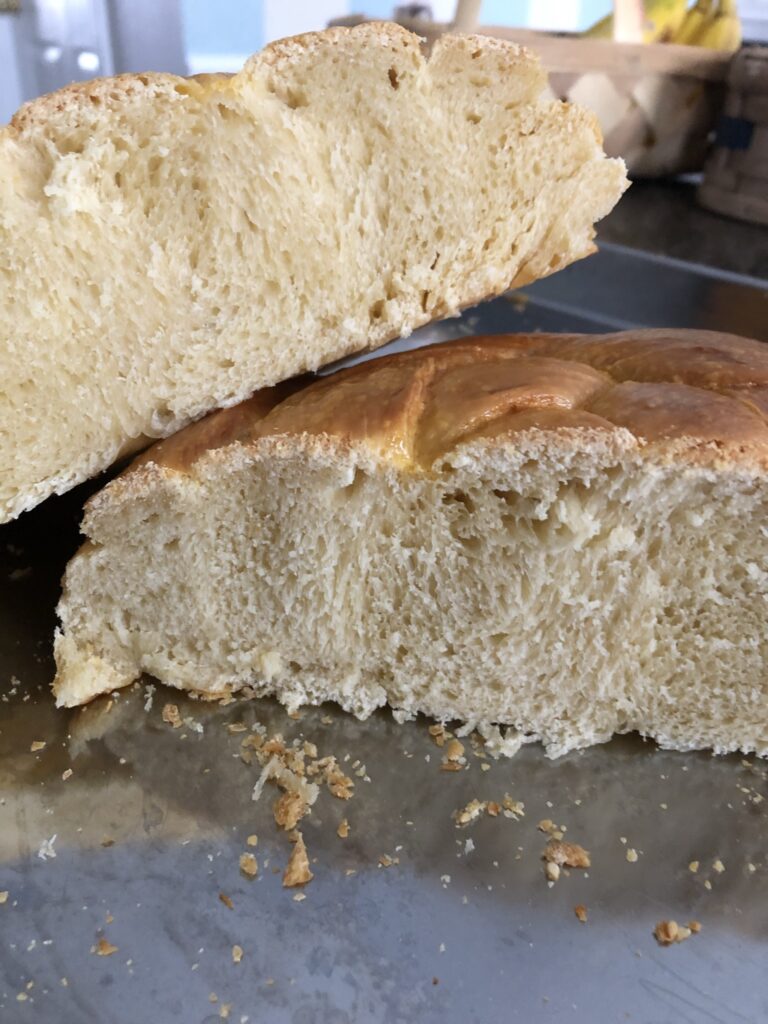
I hope you enjoy making this amazing sourdough challah and leave a comment below on how it turns out for you or any alternatives you create with it!

Sourdough Challah
Ingredients
Dough
- ¾ cup active sourdough starter
- 1 cup water
- ½ cup avocado or olive oil
- 1 Tbsp honey or maple syrup
- 2 eggs + 1 yolk
- 1½ tsp salt
- 4¾-5¼ cups all-purpose unbleached flour
- Sesame seeds (optional topping)
Egg Wash
- 1 Tbsp water
- 1 egg yolk
Instructions
The Dough
- In a large bowl or stand mixer, froth together the water and starter with your hands or a whisk. Add the oil, eggs, honey, and salt. Whisk to combine.
- Add the first 4 cups of flour one cup at a time, using the dough hook attachment to stir on low speed. Begin adding flour ¼ cup at at time on medium speed until a dough ball starts forming and no longer sticks to the sides.Note: If mixing by hand, add in first four cups at the same time and combine into a shaggy dough. Add remaining flour ¼ cup at a time, kneading with your hand to combine, until a soft dough ball forms. The dough should no longer stick to the bowl or your hands.
Bulk Fermentation
- Remove the dough from the bowl and use 1 Tbsp of oil to grease the inside of the bowl. Use the oil on your hands to coat the outside of the dough ball. Place it inside the bowl and cover with a cloth or hand towel.
- Place the bowl in a warm area such as the oven with the lights turned on. Let rest for 8-12 hrs or until doubled or nearly doubled.
- After the first ferment, gently remove the dough from the bowl with your hands or a dough scraper it will slightly deflate on its own. Place it onto a clean countertop.
Shaping the Dough
- Use a sharp knife to cut the dough in three even sections for one large loaf, or in half and then each half into three sections for two loaves.
- For round loaves, you can do a 4-strand round braid like I did above. Otherwise you can spiral a 3 strand braided loaf into a round loaf.
- Once the dough is shaped, remember to tuck the ends under to seal the edges.
- On a parchment lined baking sheet, place two round loaves or one long braided loaf to allow room for expansion. Cover with a damp tea towel.
Slow Fermentation
- To bake as soon as possible, leave the loaves covered in a warm place for 3-4 hours before baking.
- To do long fermentation, place the loaves on the baking sheets in the refrigerator for at least 14 hours or up to 48 hours. I leave mine for the full 48 hours.
Baking
- After the second ferment, uncover the loaves. Preheat the oven to 375 °F. In a small bowl, whisk together one egg yolk and 1 Tbsp water. Use a pastry brush to paint the egg wash onto the bread. If desired, sprinkle sesame seeds on top for garnish.
- Bake the bread for 20 minutes then remove from the oven. Use the remaining egg wash for a second coating in the areas that expand in the oven. Place the bread back into the oven for 20 more minutes, making sure the baking sheet has been turned 180° so it can brown evenly.
- Let the bread rest for at least 10 minutes before serving. Enjoy!
Notes
- This recipe makes one large loaf, or 2 medium sized loaves. The smaller loaves can be braided or done in round loaves, but I recommend braiding the large loaf to allow a more even bake.
- The challah can be stuffed with things like cheese, veggies, or other fillings. After separating the strands, flatten them and add a small amount of filling then pinch the side together to close and braid normally.
- Any mix-ins such as apple pieces or raisins should be added while combining the dough ingredients.
- If your dough does not rise well during the bulk fermentation, your starter may be hungry. Make sure to use active, bubbly starter.